Getting Started
Use Fynd Console to set up your organization, open GlamAR, invite your team, and create credentials for AR Try-On and Skin Analysis.
Create a Fynd account
- Open Fynd Console.
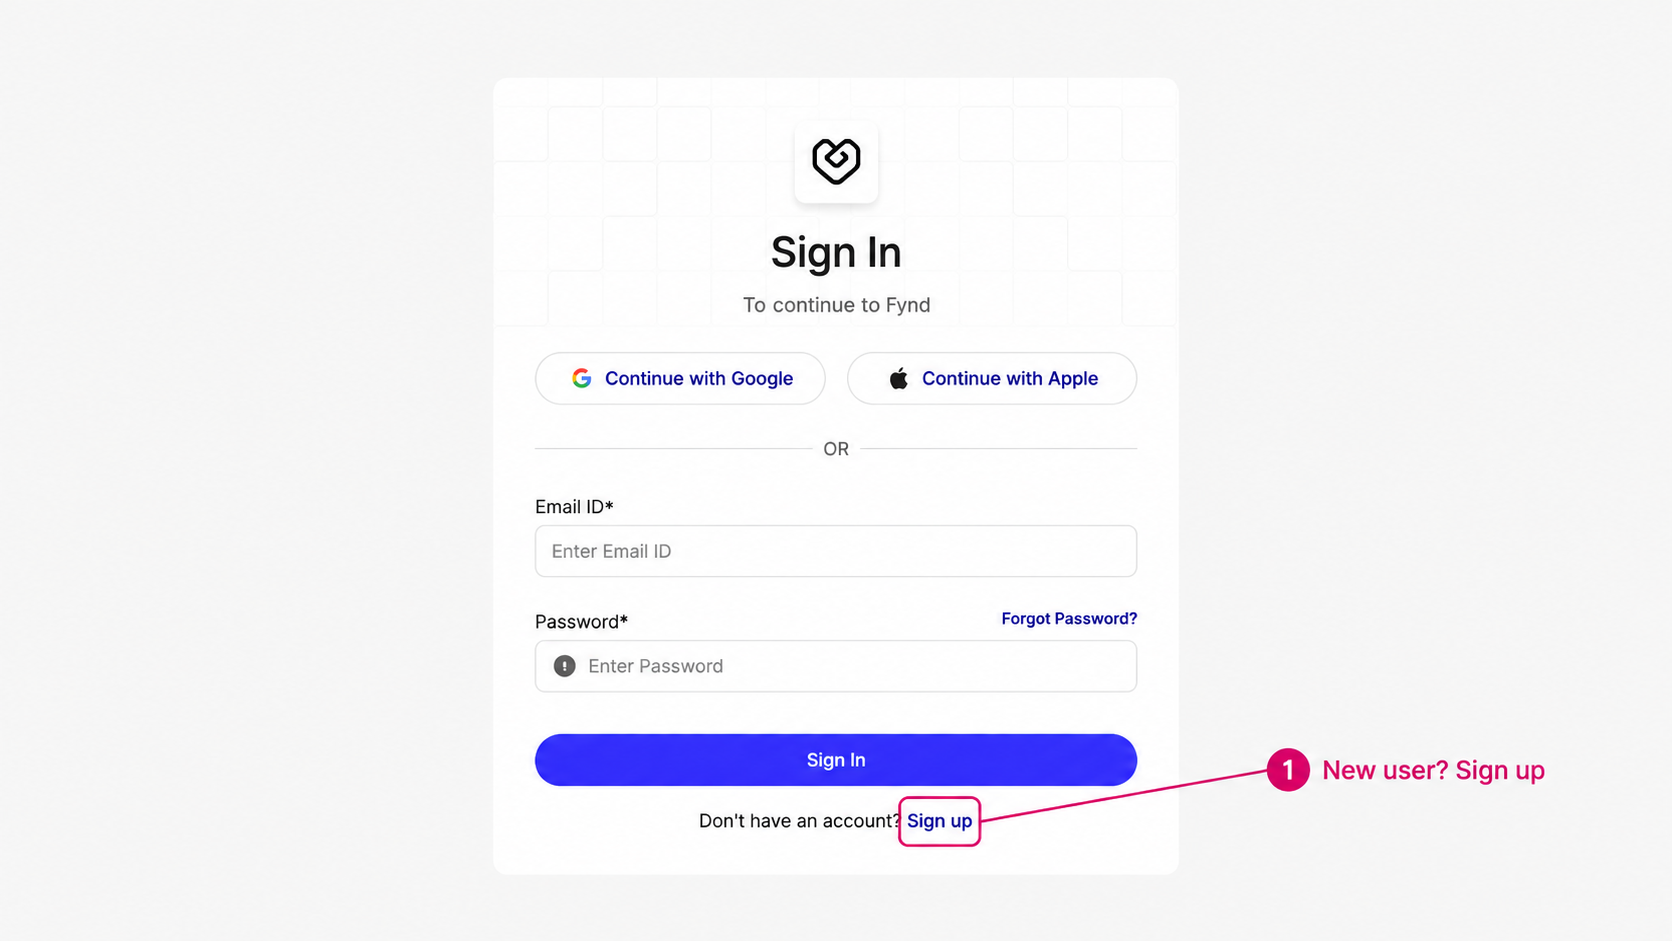
- Select Sign Up if you are new to Fynd. If you already have a Fynd account, select Sign In.
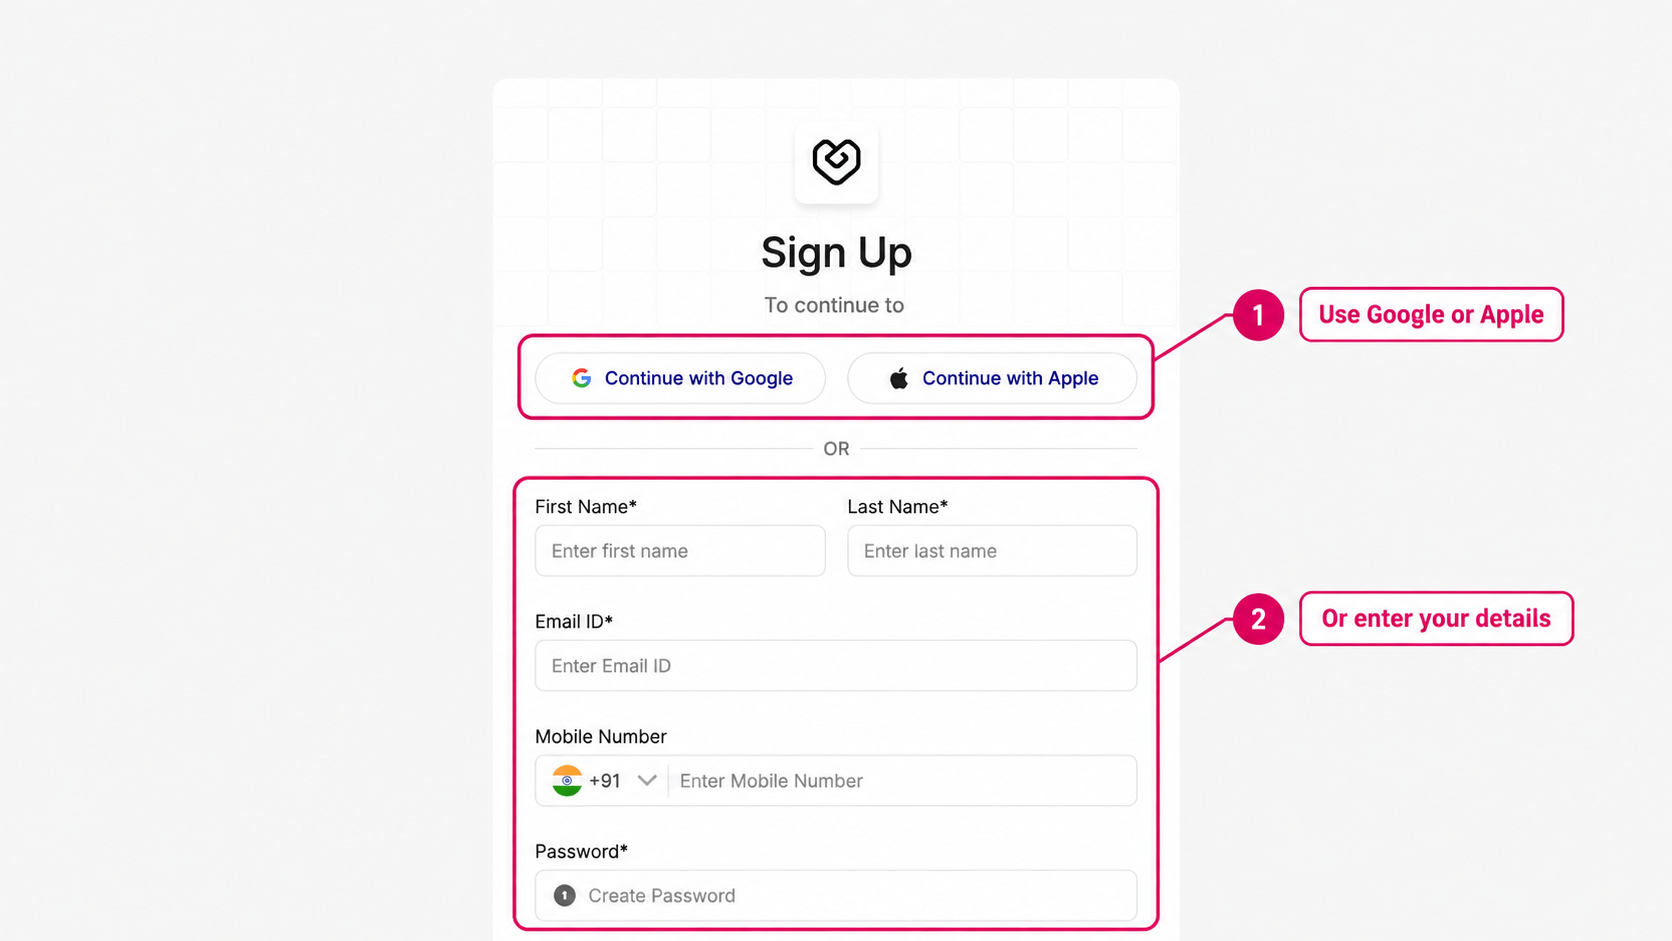
- Sign up with Google or Apple, or enter your first name, last name, email address, mobile number, and password.
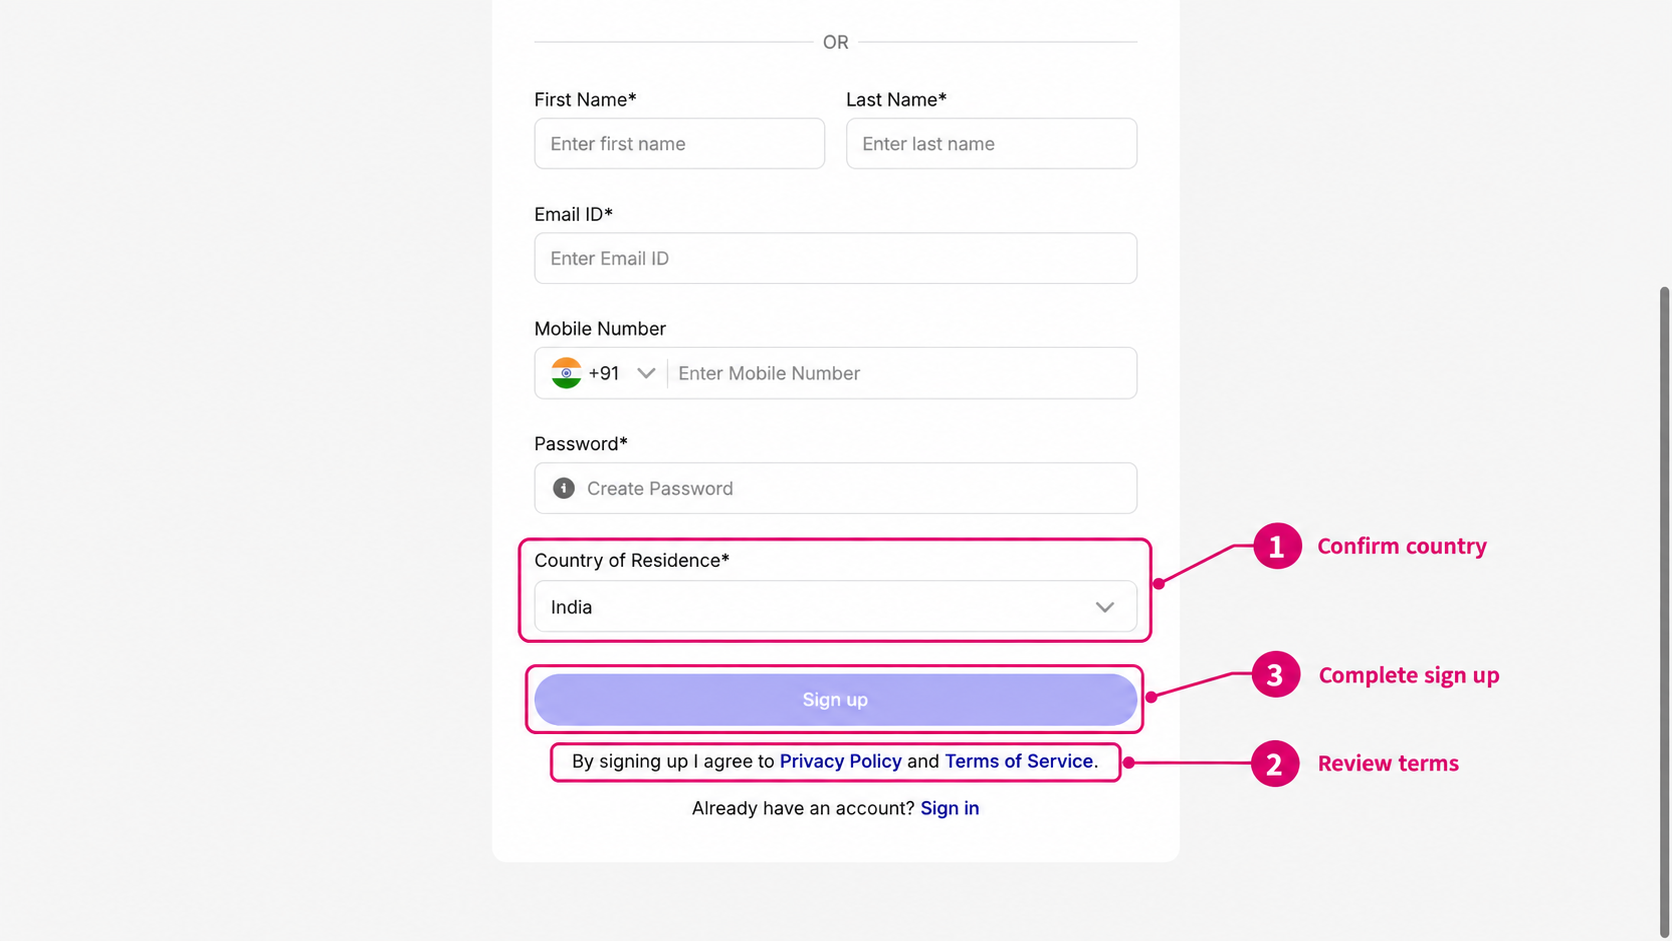
- Select your country of residence, review the linked policies and terms, and select Sign up. Complete any verification requested by Fynd Console.
Set up your organization
Complete the organization setup presented after signup. Use your business or team name for the organization.
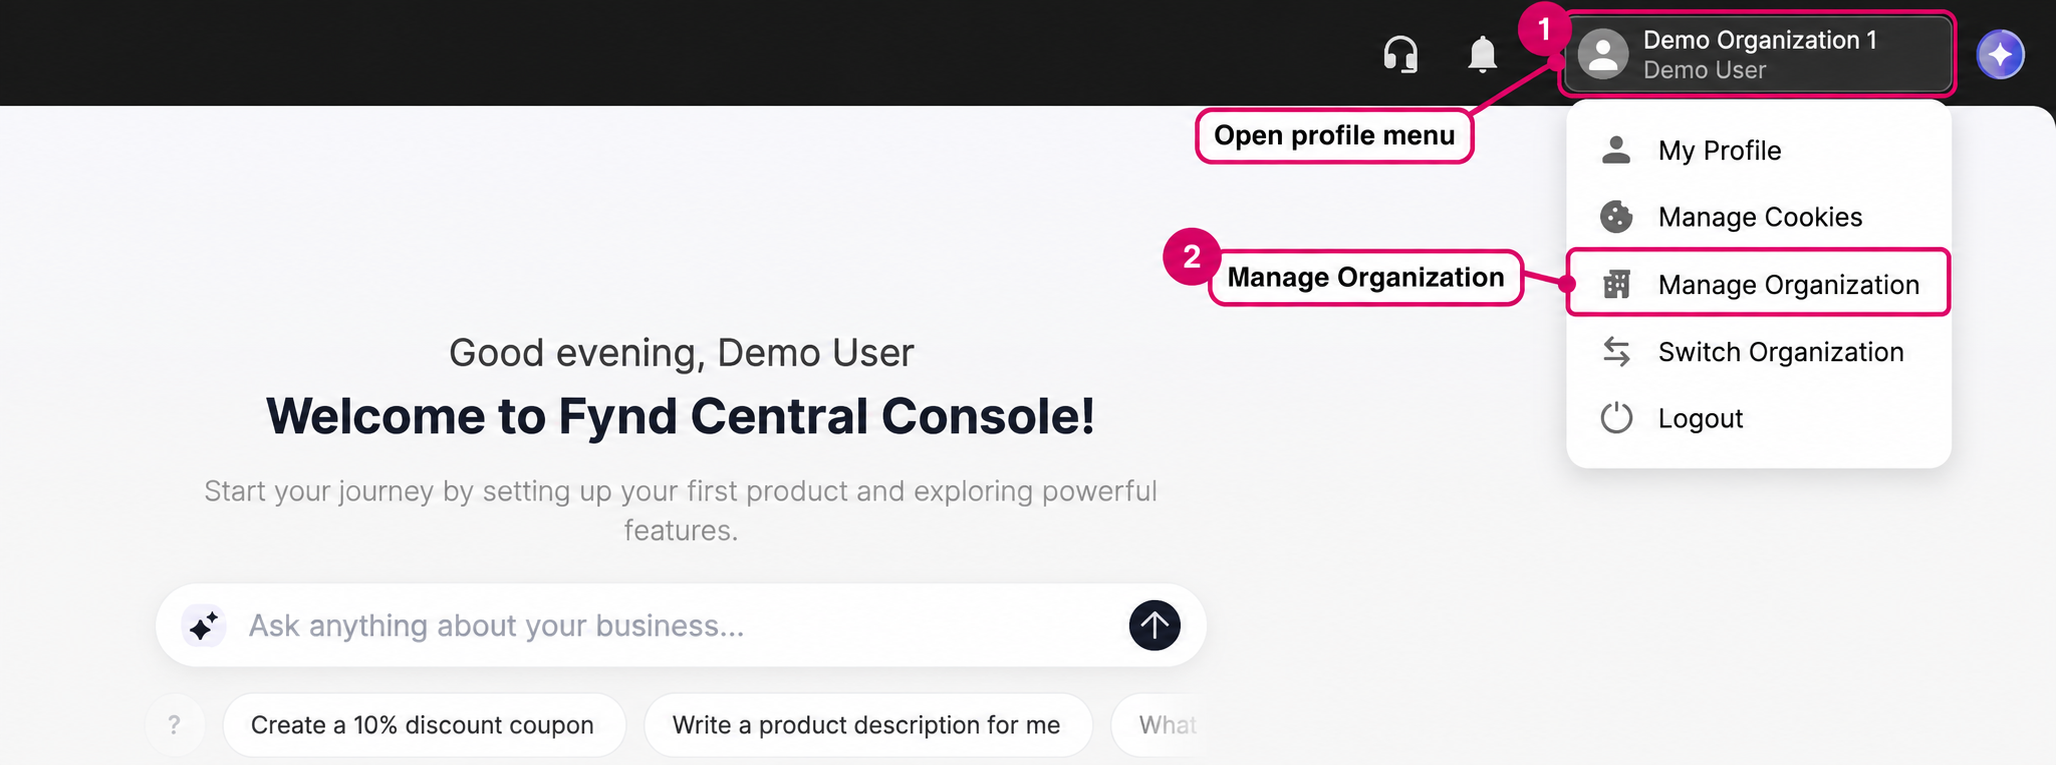
If you already belong to an organization, select it on Choose Organization. To change organizations later, open your profile menu and select Switch Organization.
Your Fynd organization groups your product accounts and team access. Select the organization that should own your GlamAR work before continuing.
Open your GlamAR account
- In Fynd Console, open More Products and select GlamAR.
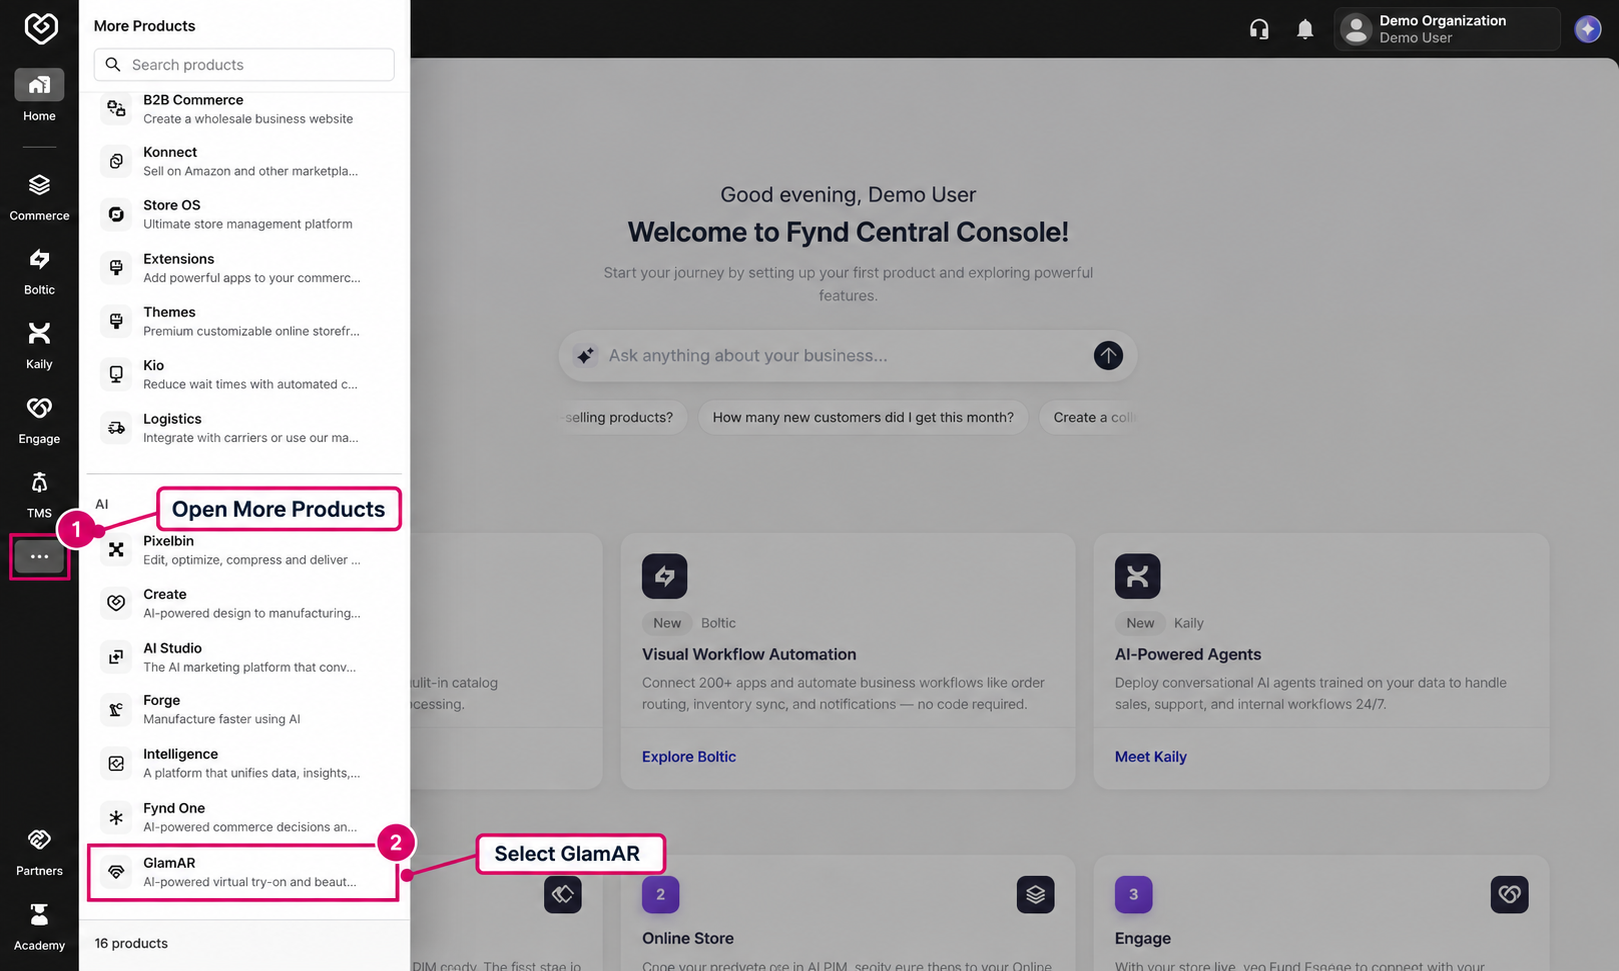
- Select the GlamAR product account you want to use.
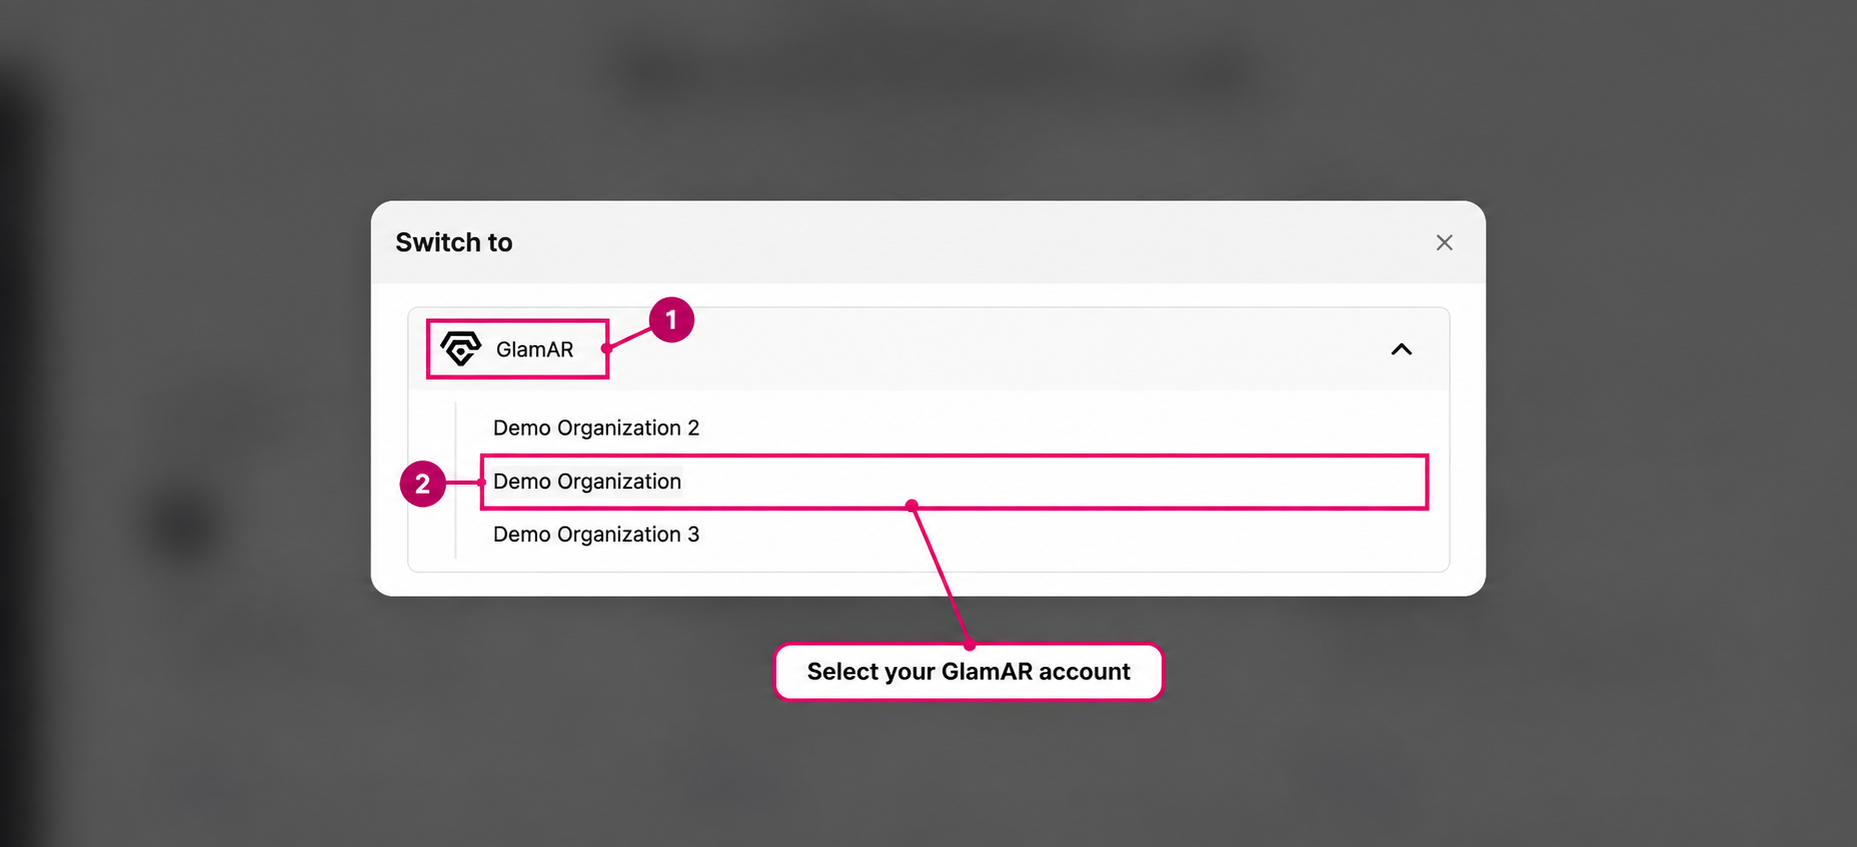
- If you do not yet have a GlamAR account, complete the setup offered for GlamAR. For access to an existing team account, ask its owner or administrator to invite you.
Your GlamAR product account contains the products, apps, configuration, and credentials used by your integrations. Keep the same account selected while setting up your SDK or Shopify plugin.
A Fynd organization and a GlamAR product account have different identifiers. When a GlamAR API requires orgId, use the GlamAR account identifier associated with your credentials, not the Fynd organization UUID.
Add your team
An organization owner or an administrator with permission to manage members can invite colleagues to a GlamAR product account.
- Open your profile menu and select Manage Organization.
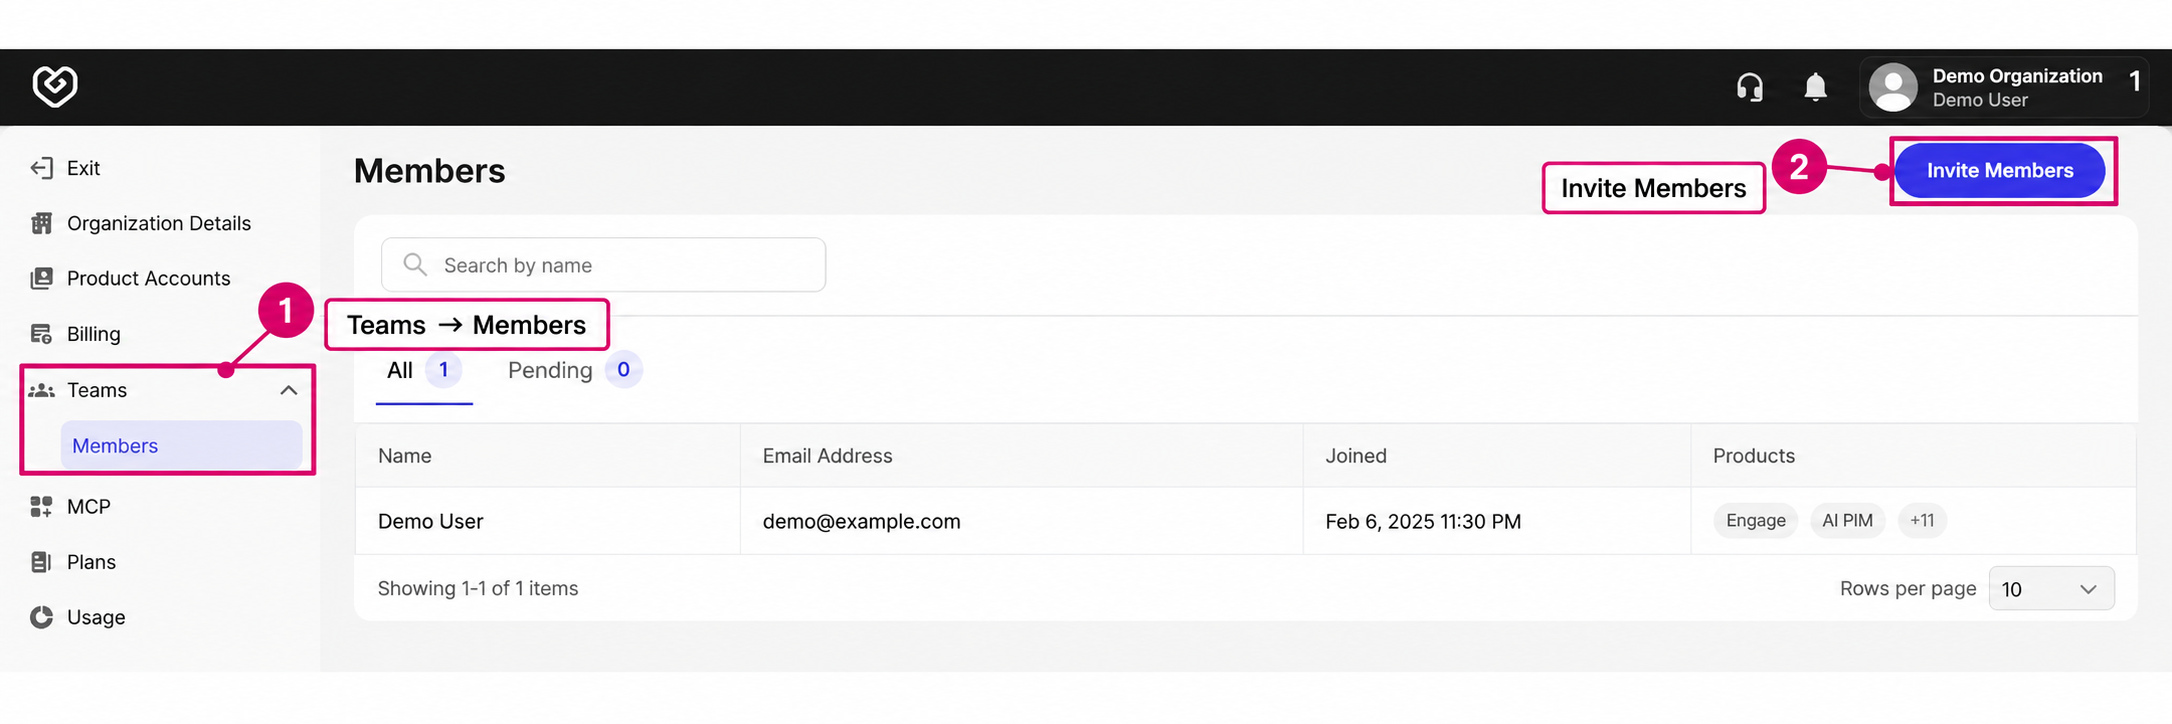
- Go to Teams → Members and select Invite Members.
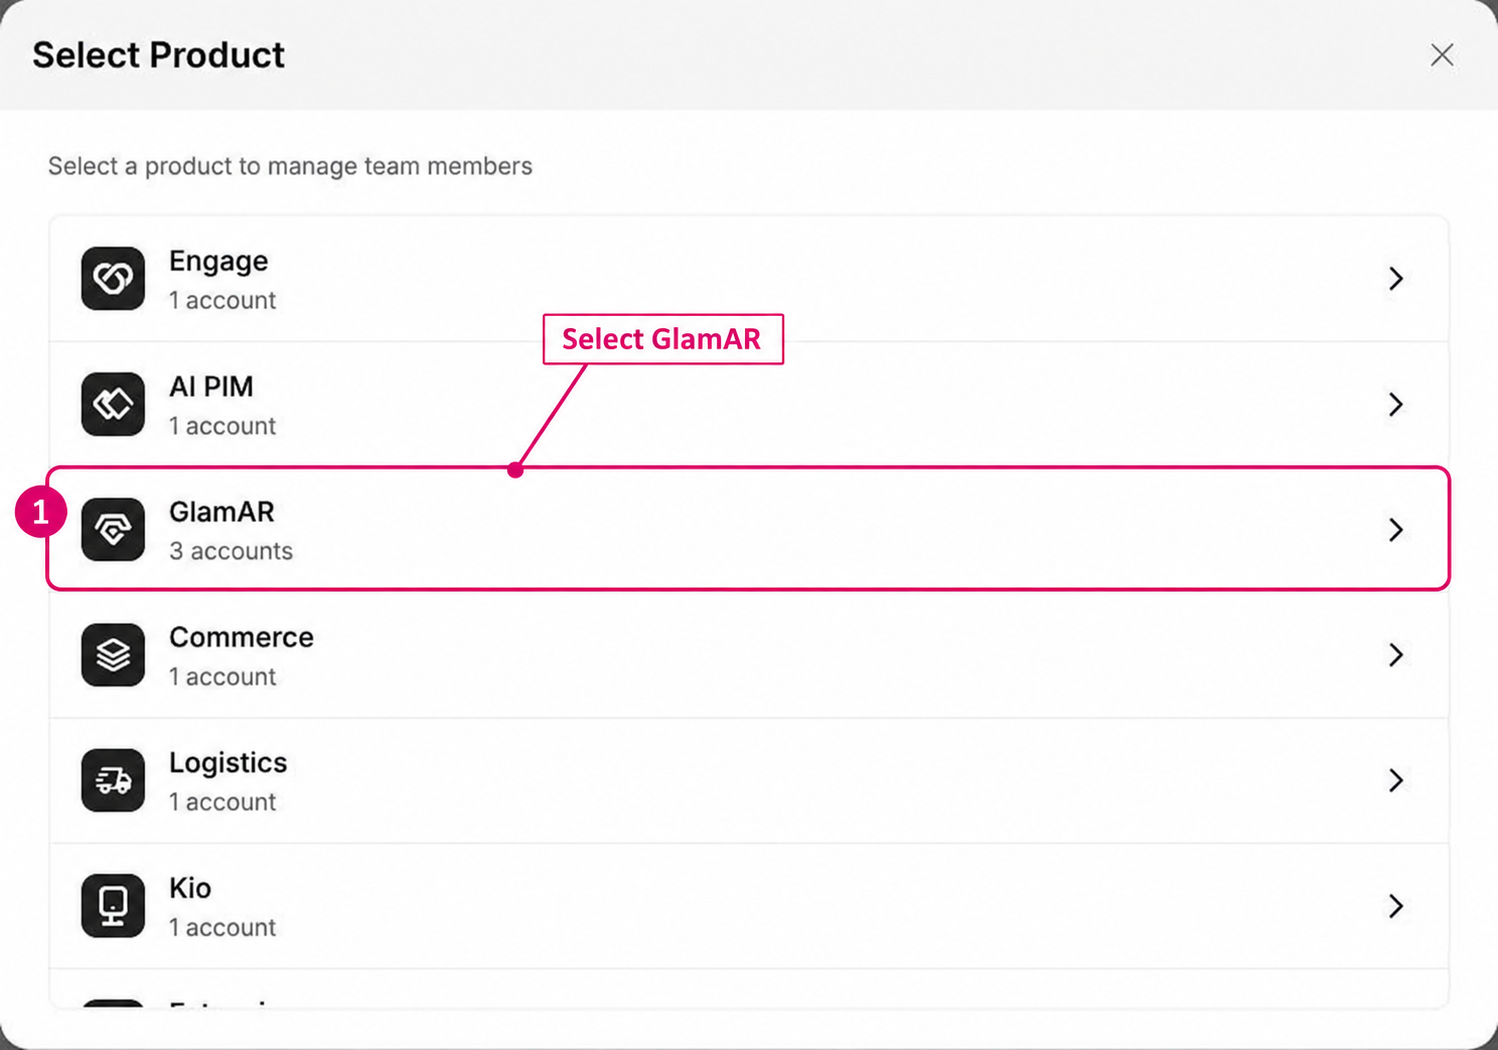
- Select GlamAR, then choose the product account the member needs to access.
- Confirm the Product and Product Account.
- Enter the member's Email ID and select the required Role. Use Add Another Email to invite more people.
- Select Invite. The recipient must accept the invitation to join the selected account.
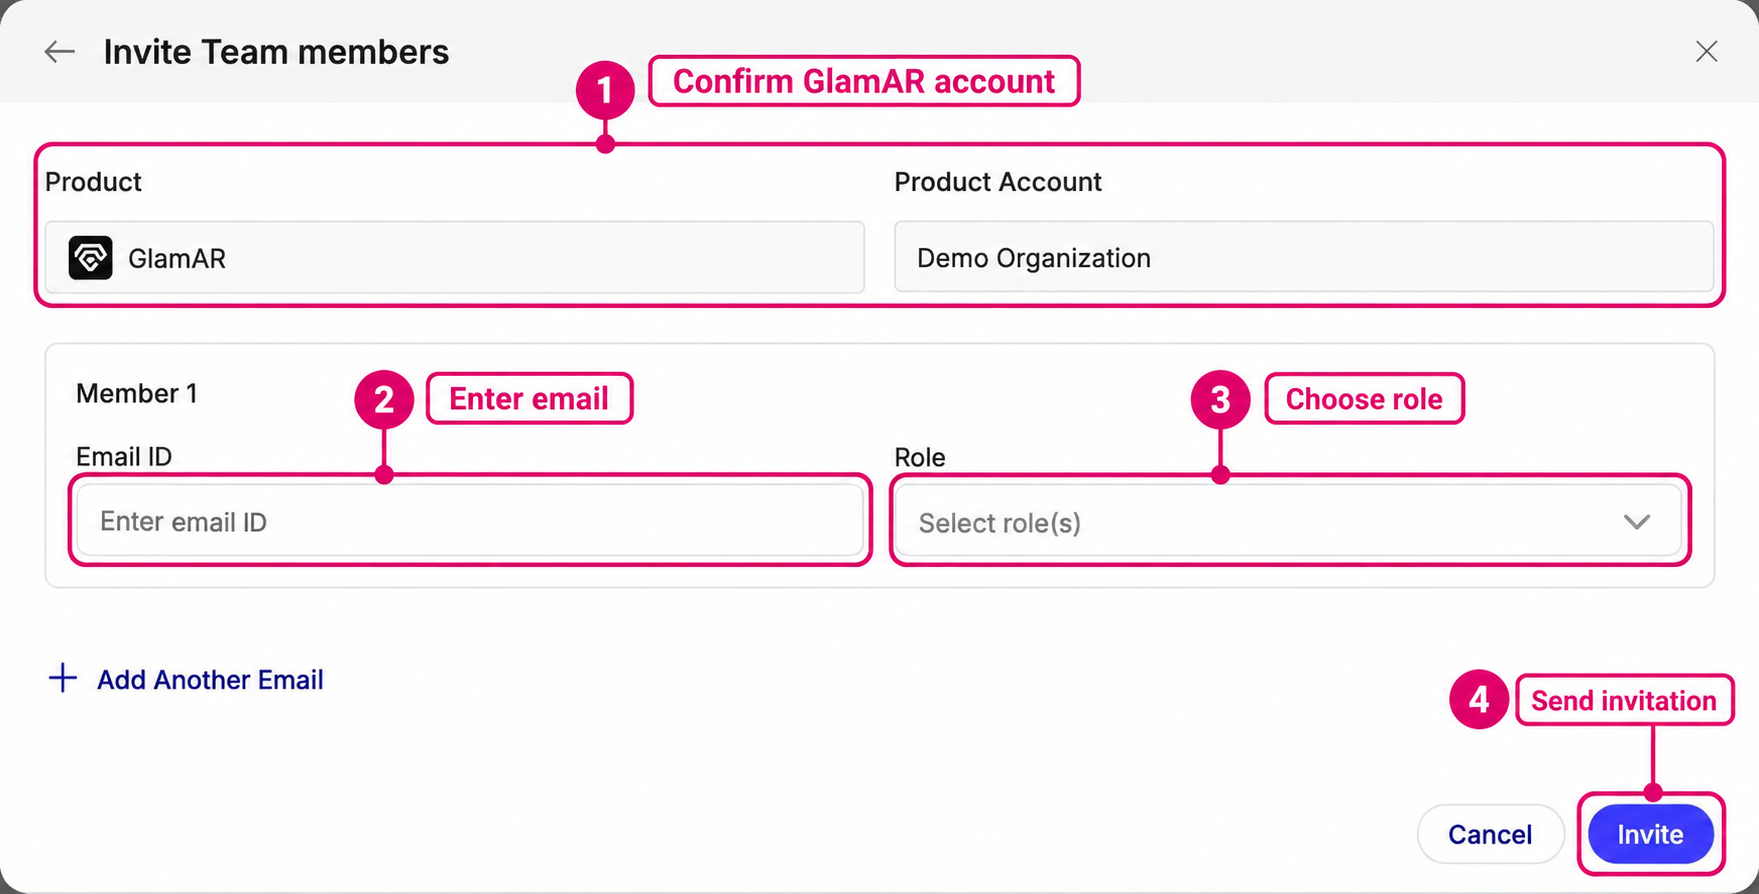
Screenshots use example organization names and Demo User details.
Available GlamAR roles include Support, Collaborator, Developer, Admin, and Owner. Choose the role that matches the member's responsibilities. Review outstanding invitations in the Pending tab on the Members page.
Token
Create credentials inside the GlamAR product account you will use for your integration. An access token and an API key are different credentials with different purposes. They are not interchangeable.
| Credential | Used for | Where to use it |
|---|---|---|
| Access token (Access Key) | Initializing and authenticating the GlamAR SDK for AR Try-On or Skin Analysis. | Pass it to the SDK as described in your platform's setup guide. Apply the domain or app restrictions supported by that integration. |
| API key (API Token) | Authenticating direct calls to GlamAR platform or public APIs. | Keep it on your server. Route requests from your website or mobile app through your own backend proxy. |
The SDK setup guides call the access token an Access Key. The API references and Shopify plugin use the label API Token for the API key. Copy the value that matches the field you are configuring; do not pass an API key to SDK initialization.
Use a backend proxy for API calls
For a custom API integration, use this request flow: Your website or mobile app → your backend proxy → GlamAR API.
Your backend authenticates the user, checks which operations they can perform, and adds the API key using the authentication format required by the endpoint. It then calls GlamAR and returns the required response to your app. Keep the API key in a server-side environment variable or secret manager; never return it to the client or embed it in frontend JavaScript, a mobile app bundle, or a public repository.
When using a GlamAR Shopify plugin, enter the credentials in its designated Access Key and API Token fields. Do not put the API token in your storefront theme code.
Create a token
1. Open Settings → Tokens
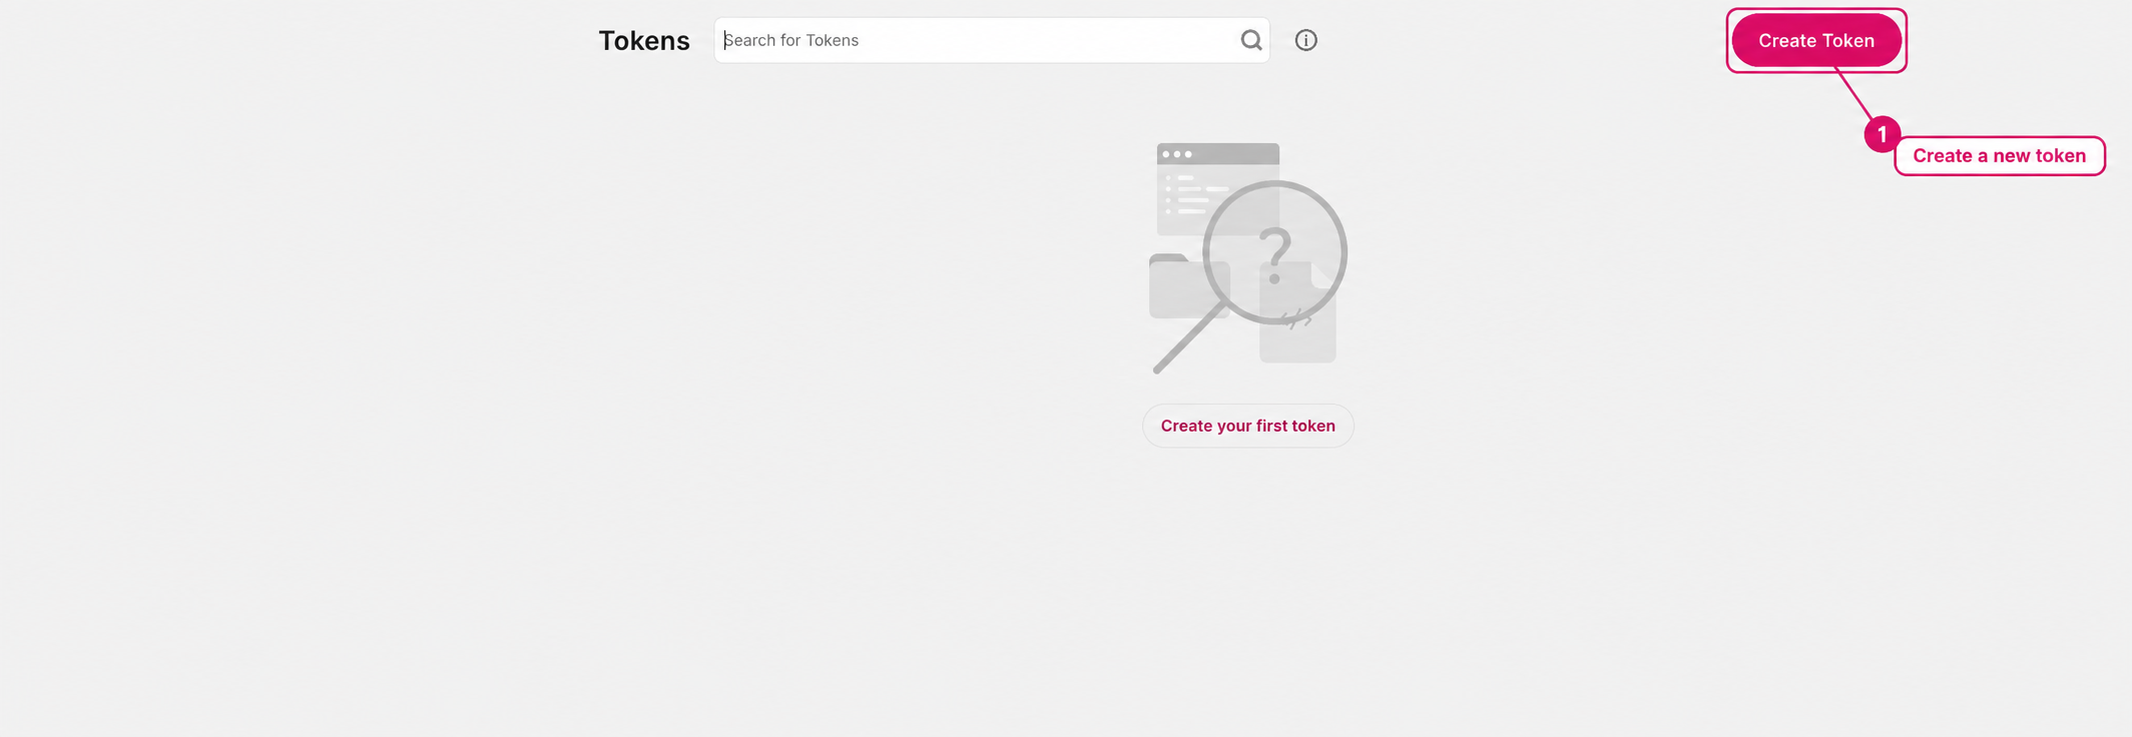
In your GlamAR account, open Settings → Tokens.
2. Select Create Token
3. Name your token and select Create
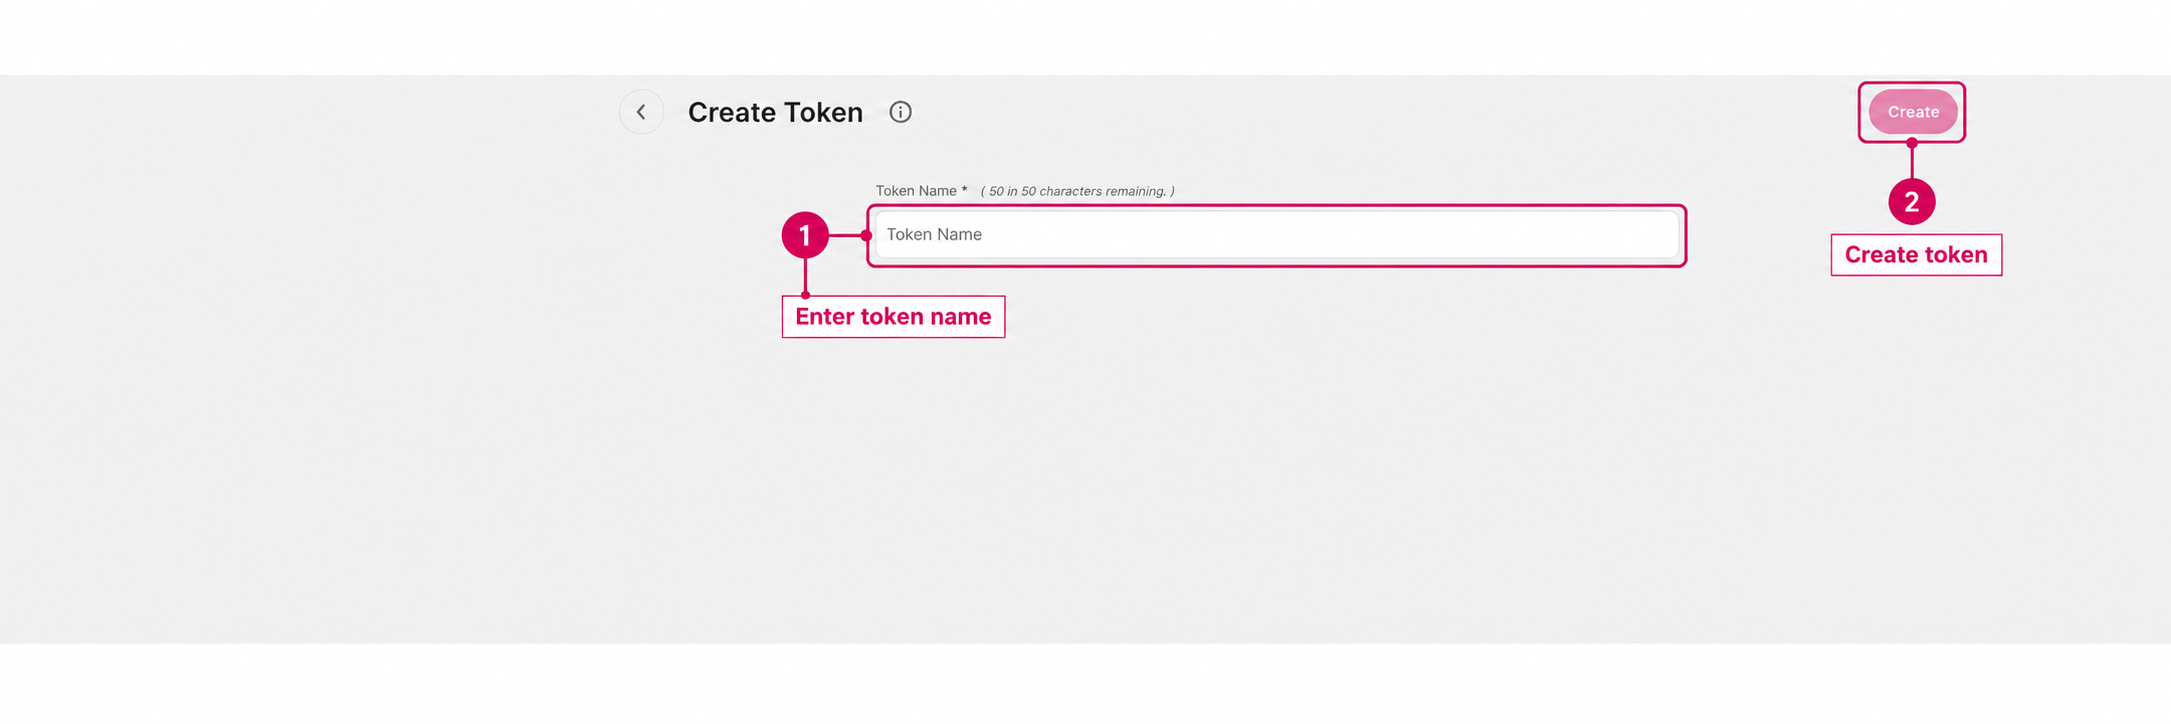
Enter a descriptive Token Name, such as Website integration, then select Create. The name can contain up to 50 characters.
4. View your tokens
Return to Settings → Tokens to find the tokens for the selected GlamAR account.
5. Copy the credentials for your integration
Copy the credential required by your integration:
- SDK integration: Copy the Access Key (access token) and use it in SDK initialization.
- Platform or public API integration: Copy the API Token (API key) and store it securely on your backend. Your proxy uses this value when calling GlamAR APIs.
- Shopify plugin: Copy both values into their matching Access Key and API Token fields.
If the full API token is no longer available, use the actions offered in the Tokens page to obtain replacement credentials.
Follow the setup guide for your AR Try-On SDK or Skin Analysis SDK to configure the credentials and any allowed domains.
Check your plan and usage
Open your GlamAR product account in Fynd Console. The Dashboard → Your Current Plan section shows the account subscription. Open Analytics → Plans to review Credits Usage and the current billing cycle. Confirm that the account has an active plan and enough credits for the features you need. If you cannot access this information, contact your account owner or GlamAR support.
Security Best Practices
- Keep API keys (API tokens) out of client code, public repositories, screenshots, and shared documents.
- Store server-side credentials in environment variables or a secret manager.
- Configure allowed domains for browser SDK integrations as described in the SDK setup guide.
- Replace credentials if they are exposed, and remove unused tokens from the account.