


How to Add GlamAR Virtual Try-On to Your E-commerce Store: A Complete Integration Guide


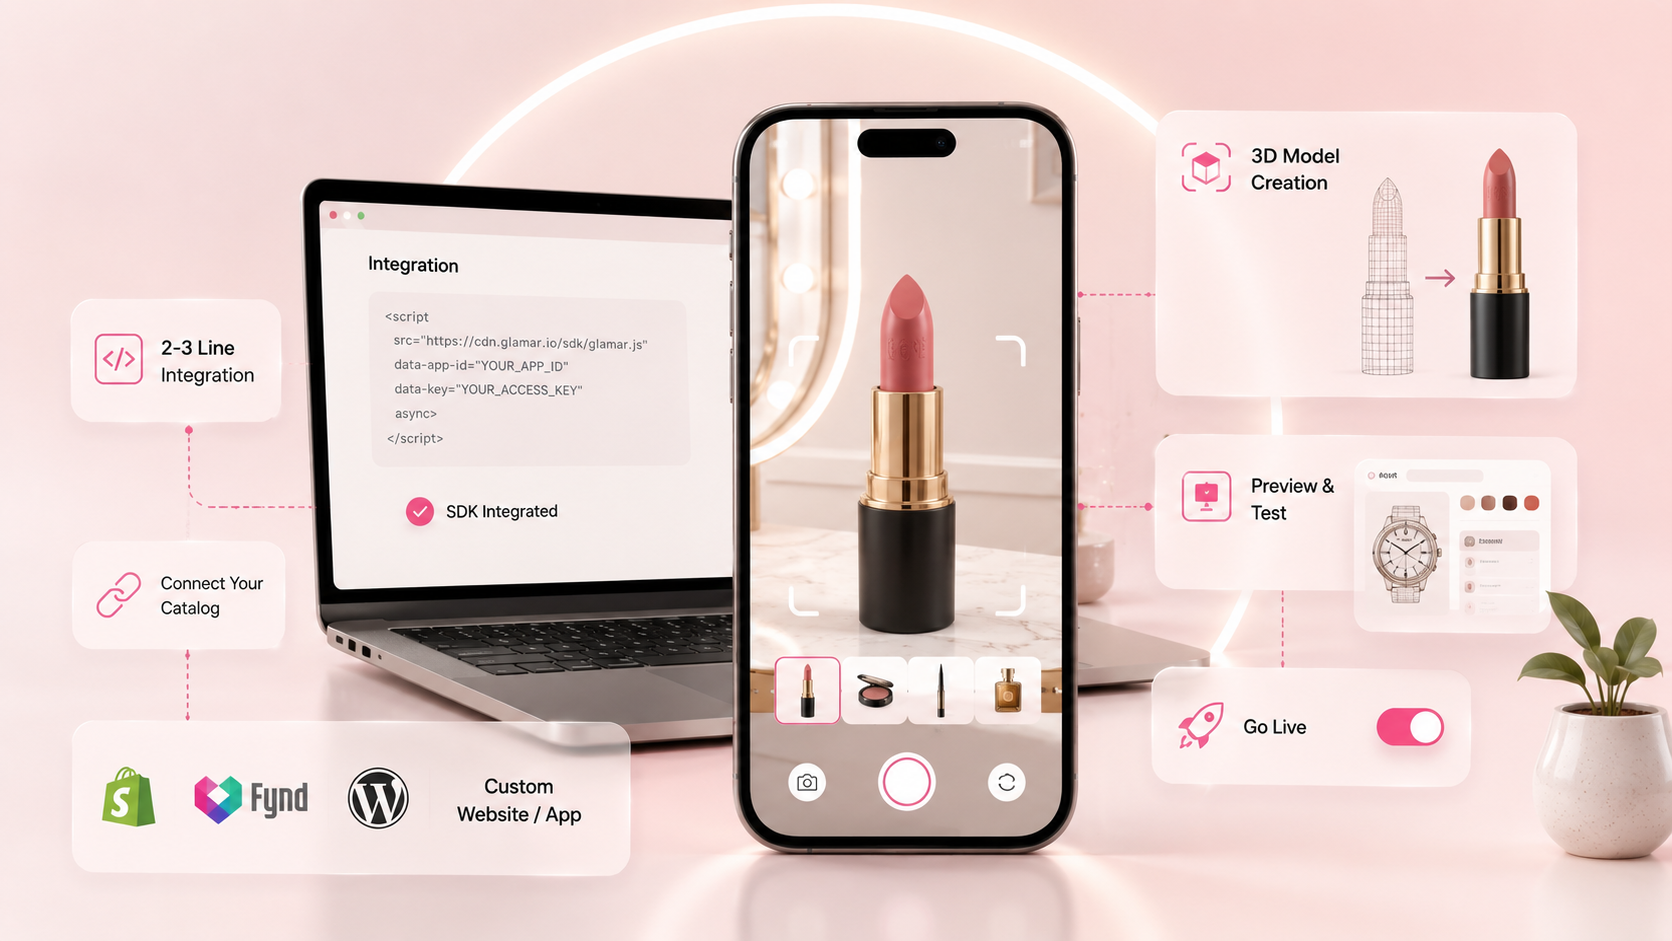
Adding GlamAR virtual try-on to your e-commerce store takes 2–4 weeks from sign-up to going live - and most of that time is 3D model creation, not technical integration. The actual code integration is a 2–3 line embed for web-based deployments. This guide walks through the full process: what to prepare, which integration path fits your platform, and what to do after go-live.
What GlamAR Integration Actually Involves
Before getting into steps, it helps to understand what the integration is and isn't.
What it is: GlamAR is delivered as an SDK (Software Development Kit) - a package of pre-built AR tools that developers add to an existing website or mobile app. You don't build virtual try-on from scratch. You integrate GlamAR's ready-made AR engine into your platform and connect it to your product catalogue.
What it isn't: It's not a plugin you install in five minutes without touching code. Some platforms (Shopify, Fynd) have purpose-built extensions that reduce developer effort significantly. Custom-built storefronts require a developer to implement the SDK embed. Either way, you're connecting GlamAR's AR engine to your specific products, which requires 3D models of those products.
The three integration paths:
Before You Start: What to Prepare
The most common reason GlamAR integrations take longer than expected is arriving without the right assets ready. Do this before you contact the GlamAR team or attempt any technical integration.
1. Know your product catalogue scope
Decide which products get virtual try-on first. You don't need to do your full catalogue in one go, in fact, starting with your top 20–50 SKUs by sales volume or return rate is the recommended approach. Virtual try-on requires a 3D model per SKU, so catalogue scope directly determines how long the setup phase takes.
GlamAR supports virtual try-on across: makeup (lipstick, eyeshadow, blush, eyeliner, foundation), eyewear (glasses, sunglasses), jewellery (necklaces, rings, bracelets, earrings), accessories (hats, scarves, nails), hair colour, watches, furniture, clothing, and footwear.
2. Gather your product references for 3D model creation
If you don't have existing 3D models (most brands don't), GlamAR's team creates them for you. To do this, they need:
- High-quality product images from multiple angles (front, side, back, detail close-ups)
- Exact product specifications: dimensions, materials, colour references (Pantone or hex codes where relevant)
- For jewellery and watches: technical drawings or CAD files if available - these produce significantly more accurate 3D models than images alone
The better your reference material, the faster and more accurate the 3D model creation. Poor quality references are the most common cause of 3D model revision cycles.
3. Check your existing 3D assets
If you already have 3D models from a previous project, check what format they're in. GlamAR accepts GLB and GLTF formats for web-based AR. OBJ and FBX files can typically be converted. Share your existing assets with the GlamAR team at the start, you may be able to skip model creation for some SKUs entirely.
4. Get your access credentials ready
Once you've signed up and your plan is active, GlamAR provides:
- An App ID - identifies your GlamAR account
- An Access Key - authenticates your integration
You'll need both to initialise the SDK. Keep them secure - do not expose them in client-side code without appropriate access controls.
Integration Path 1: Shopify
The GlamAR Shopify App is the fastest path to go-live for Shopify brands.
Step 1: Install the GlamAR app from the Shopify App Store Search for GlamAR in the Shopify App Store and install it. The app connects directly to your Shopify product catalogue - no manual product data upload needed.
Step 2: Configure GlamAR in Pixelbin Console After installation, access the GlamAR configuration through the Pixelbin Console:
- Paste your API Token in the API Token field
- Add your SDK viewer CSS and UI code in the SDK Config editor
- Paste your custom metadata in the GlamAR config editor
Your GlamAR account manager will provide the specific values for these fields during onboarding.
Step 3: Map your products to GlamAR's catalogue In the GlamAR extension, products appear in three states:
- Publish List - mapped and published products with active try-on
- Unpublish Category - mapped products not yet published
- No Data Field - products not yet mapped to 3D models
Upload products via CSV for bulk mapping or map them individually through the console.
Step 4: Add products to GlamAR Console and upload 3D assets For each product you want to enable try-on on, add it to the GlamAR Console and connect its 3D model. If GlamAR is creating your 3D models, this step happens in parallel - they create and upload the models directly to your console.
Step 5: Preview, configure, and publish Before going live, use the console to preview how the try-on looks for each product. Adjust settings - AR intensity, product positioning, display options - for optimal performance. Once approved, publish. The "Try On" button will appear on your Shopify product pages automatically.
How to deactivate if needed: Go to Settings in the GlamAR extension → click Deactivate Account. This removes try-on from all product pages without affecting your Shopify store otherwise.
Integration Path 2: Custom Website (Web SDK)
For brands on custom-built storefronts - WooCommerce, Magento, or bespoke builds - the Web SDK is the integration method.
Step 1: Initialize the SDK on your platform - Add the GlamAR SDK initialization script to your website. This is typically a JavaScript snippet added to your site's <head> or loaded asynchronously. GlamAR's documentation at glamar.io/docs provides the exact initialization code once you have your credentials.
Step 2: Add the GlamAR embed to your product pages - On each product page where you want try-on enabled, add the GlamAR viewer embed, a 2–3 line code block that renders the AR experience. This embed takes your product's SKU ID as a parameter, which tells the GlamAR engine which 3D model to load.
Step 3: Upload your product catalogue to GlamAR Console - Log in to the GlamAR Console and add your products, either individually or via CSV bulk upload for large catalogues. Each product entry connects to its 3D model and the SKU ID that your product pages reference.
Step 4: Test in staging before going live - GlamAR supports both development and production environments. Test the full try-on flow in your staging environment first, check it works on Chrome, Safari, and Firefox, and test on both iOS and Android mobile browsers before pushing to production.
Step 5: Configure the "Try On" button placement - Work with your front-end developer to position the "Try On" button prominently on the product page - near the main product image or adjacent to the Add to Cart button. Button placement directly affects adoption rates. Hidden or below-the-fold placement kills engagement.
Integration Path 3: iOS Native App (Swift SDK)
For brands with a native iOS app, GlamAR provides a Swift SDK.Installation options:
- Swift Package Manager (SPM) - recommended for most projects
- CocoaPods - add
pod 'GlamAR' to your Podfile - Carthage — add
binary "https://raw.githubusercontent.com/pixelbin-io/glamar-swift/main/GlamAR.json"to your Cartfile
- Manual - download the latest release and drag GlamAR.framework into your Xcode project
Initialization: Initialize GlamAR in your AppDelegate when the app starts:
Adding the AR view: Add GlamArView as an IBOutlet in your view controller, then start the camera preview and apply SKUs:
Camera permissions: Add camera usage description to your Info.plist - required for App Store submission:
GlamAR depends on Alamofire. If you're using SPM, CocoaPods, or Carthage, this dependency is managed automatically. If installing manually, include Alamofire separately.
Integration Path 4: Fynd Commerce
For brands on Fynd's Commerce, GlamAR is available as a native extension through Fynd's extension marketplace.
Step 1: In your Fynd Platform account, go to Extensions → Available Extensions → search for GlamAR → Install
Step 2: In Settings → Configure GlamAR in Pixelbin, paste your API token and configure SDK settings
Step 3: Use FeedSync to map your Fynd product catalogue to GlamAR's console. Products appear in three states (Publish List / Unpublish Category / No Data) - the same system as Shopify.
Step 4: Add products to GlamAR Console individually or via CSV bulk upload. 3D assets are linked through the console.
Step 5: Preview and activate. The try-on button appears on your Fynd product pages automatically once products are published in the GlamAR console.
After Go-Live: What to Check in the First 2 Weeks
Going live is not the end of the integration - it's the start of the measurement phase.
Check 1: Try-on engagement rate. What percentage of product page visitors are clicking "Try On"? If below 10%, the button placement or awareness is the issue, not the technology. Move the button above the fold and make it more visually prominent.
Check 2: AR experience on different devices. Test the try-on experience across device types - mid-range Android phones, older iPhones, tablets. Performance varies by device hardware. If specific devices show poor performance, GlamAR's support team can assist with optimization.
Check 3: 3D model accuracy. Visually inspect each published 3D model in the AR experience. Does the watch appear the right size on a wrist? Does the lipstick shade match the actual product? Any models that look inaccurate should be flagged to GlamAR for revision before they generate returns based on AR misrepresentation.
Check 4: Conversion tracking. Set up GA4 event tracking to measure the try-on funnel: page view → try-on click → add to cart → purchase. This is the primary ROI metric. Compare conversion rates for visitors who used try-on vs. those who didn't. This data is what you use to justify expanding try-on to more SKUs.
Check 5: Page load speed., The GlamAR SDK is optimized for web performance - the bundle has been slimmed by 20% in recent releases and model load time has been reduced by 40% in the latest version. But validate load times on your product pages after integration. Product pages should load within 2–3 seconds on a mid-range mobile connection.
Common Integration Questions
Conclusion
The technical side of integrating GlamAR is simpler than most brands expect. A 2–3 line embed for web deployments, a Shopify app install, or a straightforward Swift SDK for iOS - the code effort is minimal. The real work is in the preparation: scoping your product catalogue, providing good 3D model references, and setting up proper tracking from day one.
What takes the most time, 3D model creation, is also the most valuable output. Once your 3D models are created and in the GlamAR Console, they work across AR try-on, 360° product viewing, 3D configuration, and AR ads. The integration investment pays dividends across your entire 3D commerce stack, not just virtual try-on.
To get started, contact the GlamAR team, explore the full documentation at glamar.io/docs, or check the pricing page for plan options that fit your catalogue size and platform.
Related reading:
- What are SDKs? A plain-English guide for e-commerce brands
- AR SDK vs custom development -what's the difference?
- Top 12 AR SDK providers for developers and online sellers
- Best virtual try-on plugins for Shopify brands
Ready to integrate? Talk to the GlamAR team or visit glamar.io/docs to explore the documentation.
The GlamAR SDK is a software development kit, a package of pre-built AR tools that developers integrate into an existing website or mobile app to add virtual try-on, 360° product viewing, and AI skin analysis capabilities. It removes the need to build AR technology from scratch.
Your App ID and Access Key are provided by GlamAR after you sign up and your plan is activated. They're available in your GlamAR Console account. Contact sales@glamar.io to start the process.
Yes. GlamAR's team creates 3D models from your product images and specifications as part of the onboarding process. You don't need to have existing 3D assets — but having them speeds up the process.
Yes. GlamAR has a dedicated Shopify app that connects to your Shopify product catalogue and handles most of the integration work. Developer effort is minimal for Shopify-based brands.
GlamAR accepts GLB and GLTF for web-based AR. OBJ and FBX formats can typically be converted. If you have existing 3D assets, share them with the GlamAR team at the start of onboarding to confirm compatibility.
Yes. GlamAR is SOC2, GDPR, and ISO certified. All customer data handling, including skin scan data and try-on session data, complies with GDPR requirements. Full security documentation is available at glamar.io/security.

.avif)