Setup
The GlamAR Eyewear Virtual Try-On plugin allows merchants to offer real-time AR try-on experiences directly within their Shopify storefront. This guide walks you through the complete setup process of installation and activation.
Install the GlamAR Eyewear Virtual Try-On Plugin
Before configuring AR try-on functionality, you must first install the plugin from the Shopify App Store.
- Open the Shopify App Store.
- Search for GlamAR Eyewear Virtual Try-On.
- Click on the plugin from the search results.
- Click Install.
- Approve the required permissions.
Once installation is complete, the app will appear under your Shopify Apps section.
Launch the App Setup
After installation, you’ll be redirected to the app’s launch screen. Click the Launch button to begin setting up the integration.
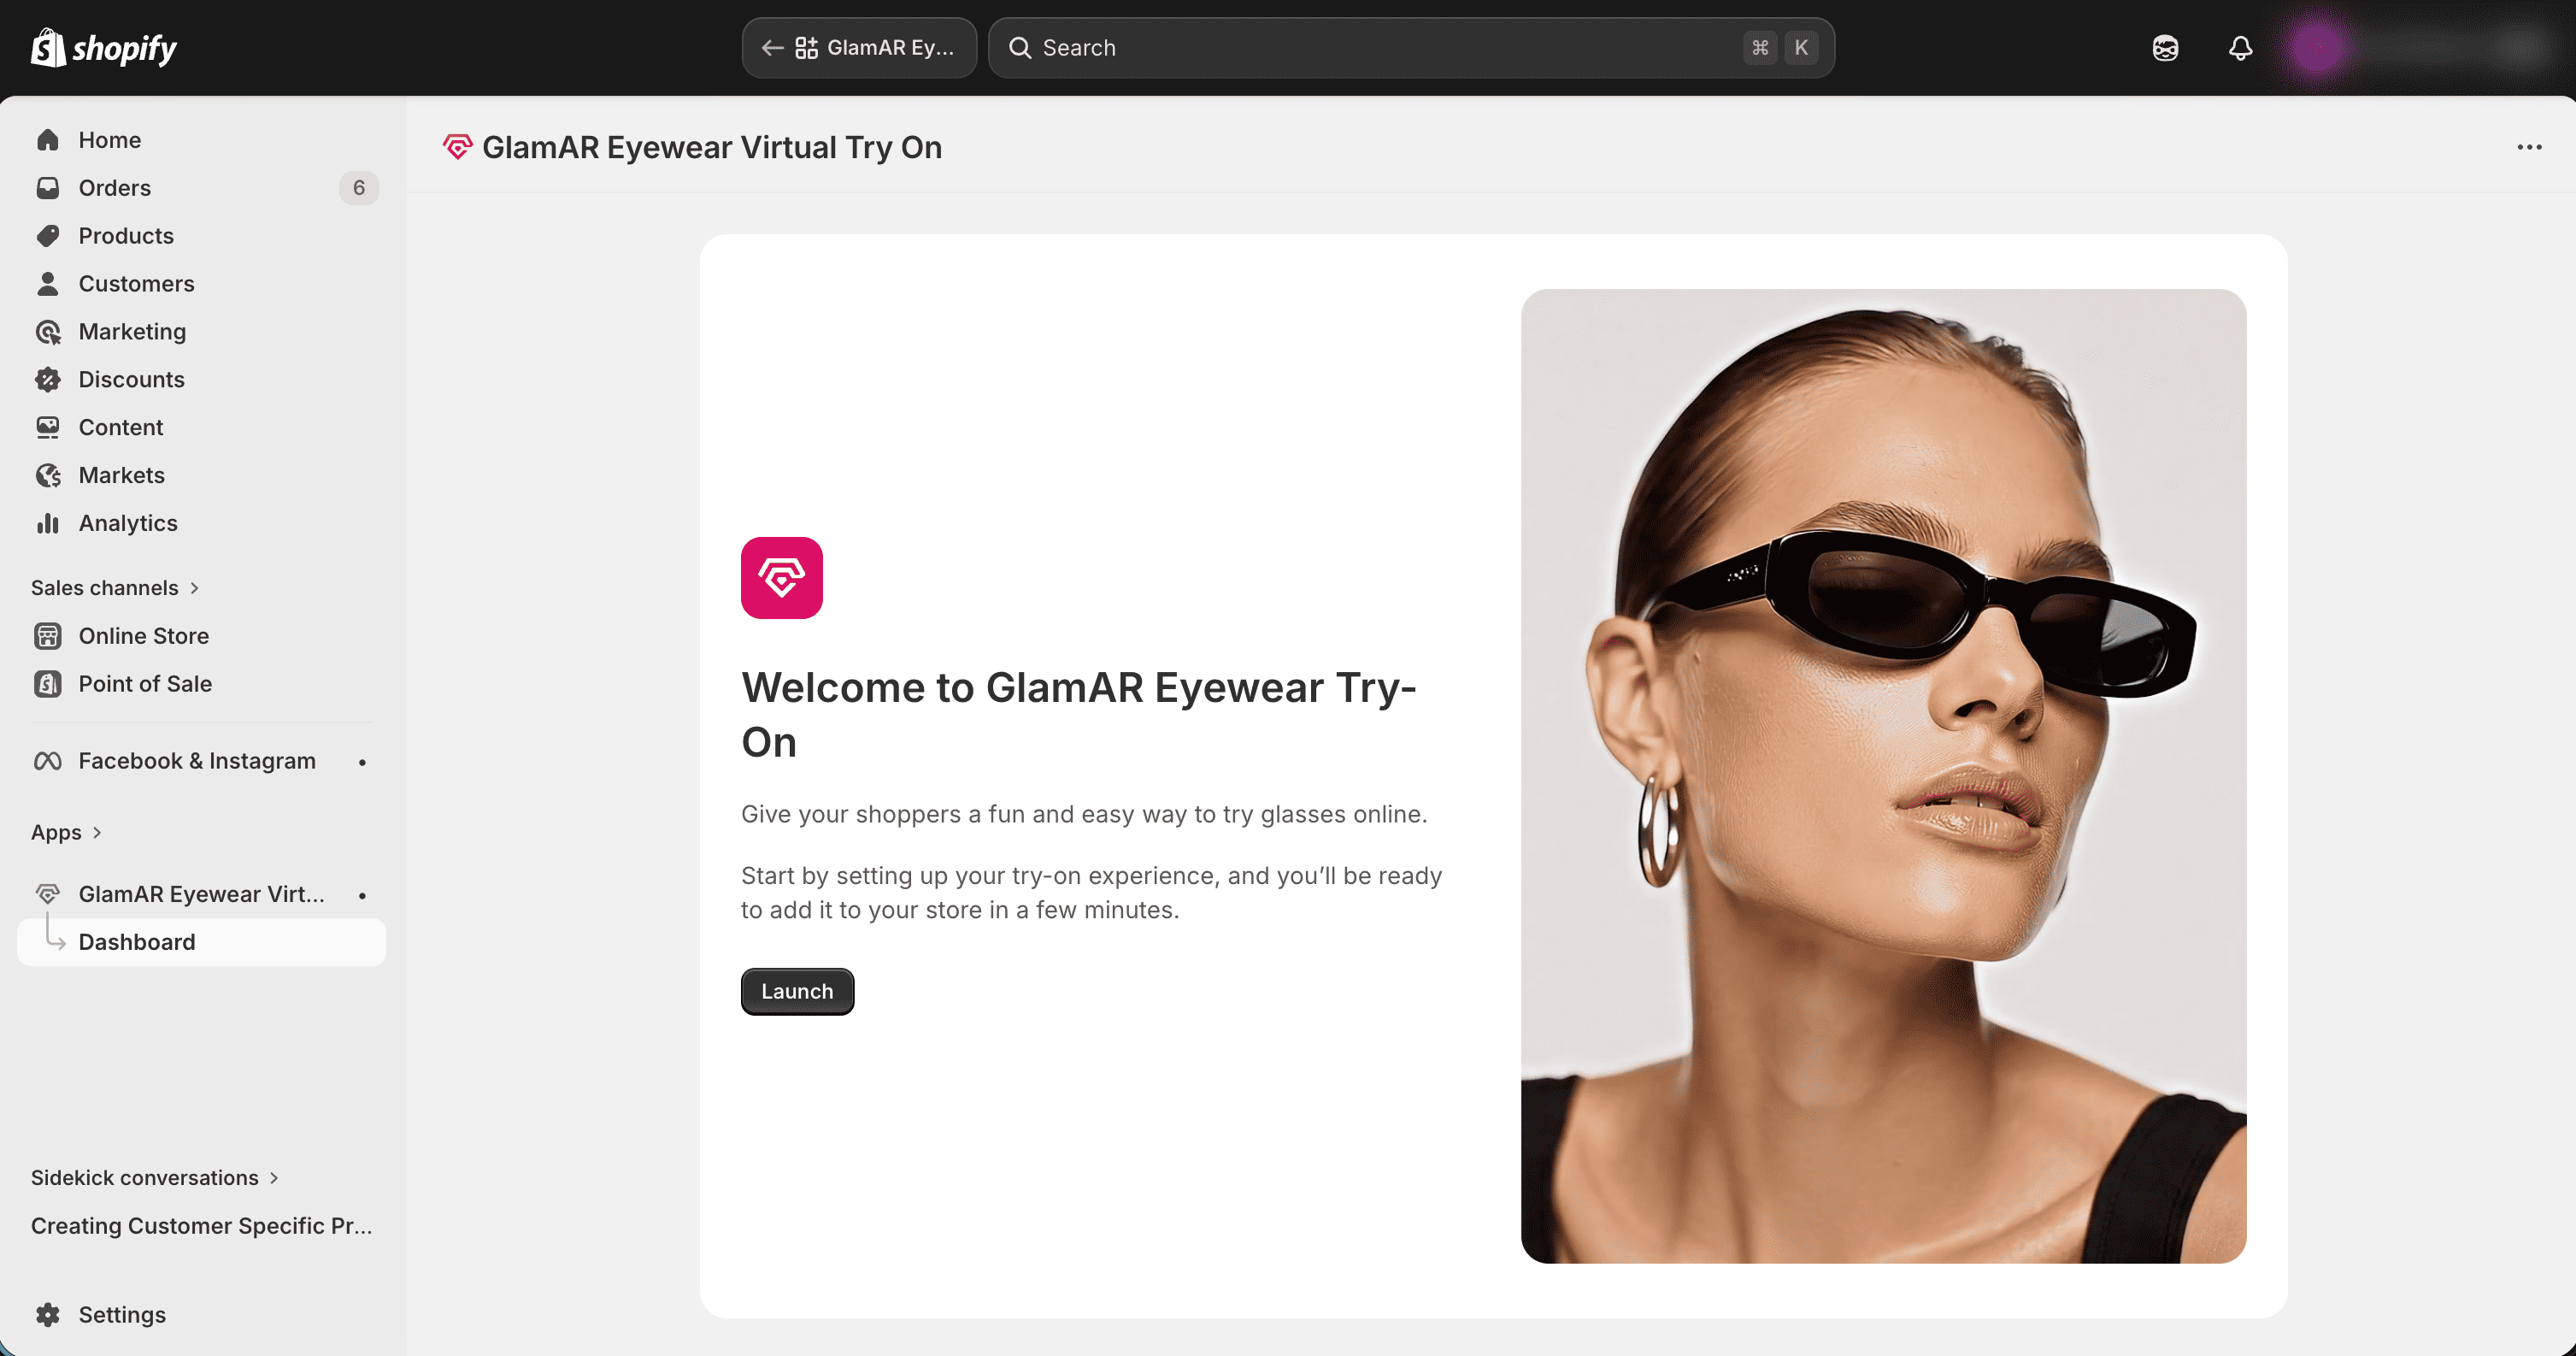
This will take you to the initial configuration page, where you’ll complete two simple steps to activate GlamAR.
Connect Your Store Securely
To enable AR functionality, connect your Shopify store using credentials from your GlamAR product account in Fynd Console.
What This Step Does
This authentication process ensures that:
- Your store is authorized to use GlamAR services
- AR assets can be loaded securely
- AI processing and try-on rendering function correctly
Enter Access Credentials
- Open Fynd Console in a separate tab.
- Sign in, choose your organization, then open GlamAR and select the product account for this store.
- Go to Settings → Tokens and select Create Token. Follow the token setup guide to create and copy the Access Key and API Token from the same token.
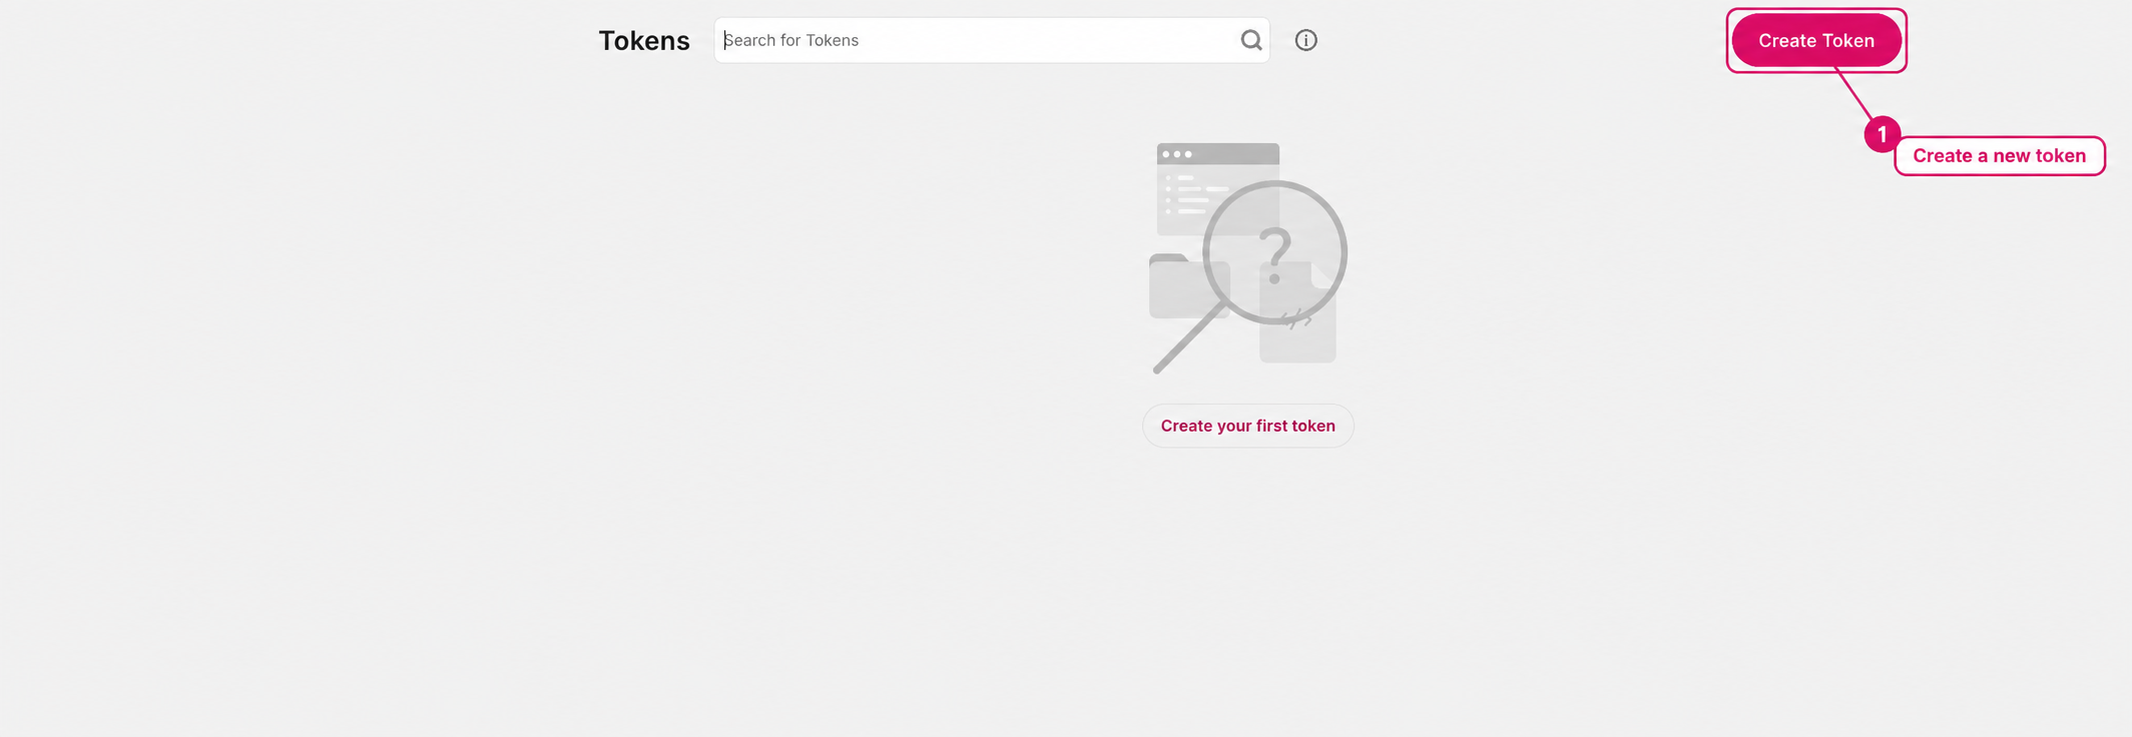
- Return to the Shopify setup page, paste the Access Key and API Token, and select Submit.
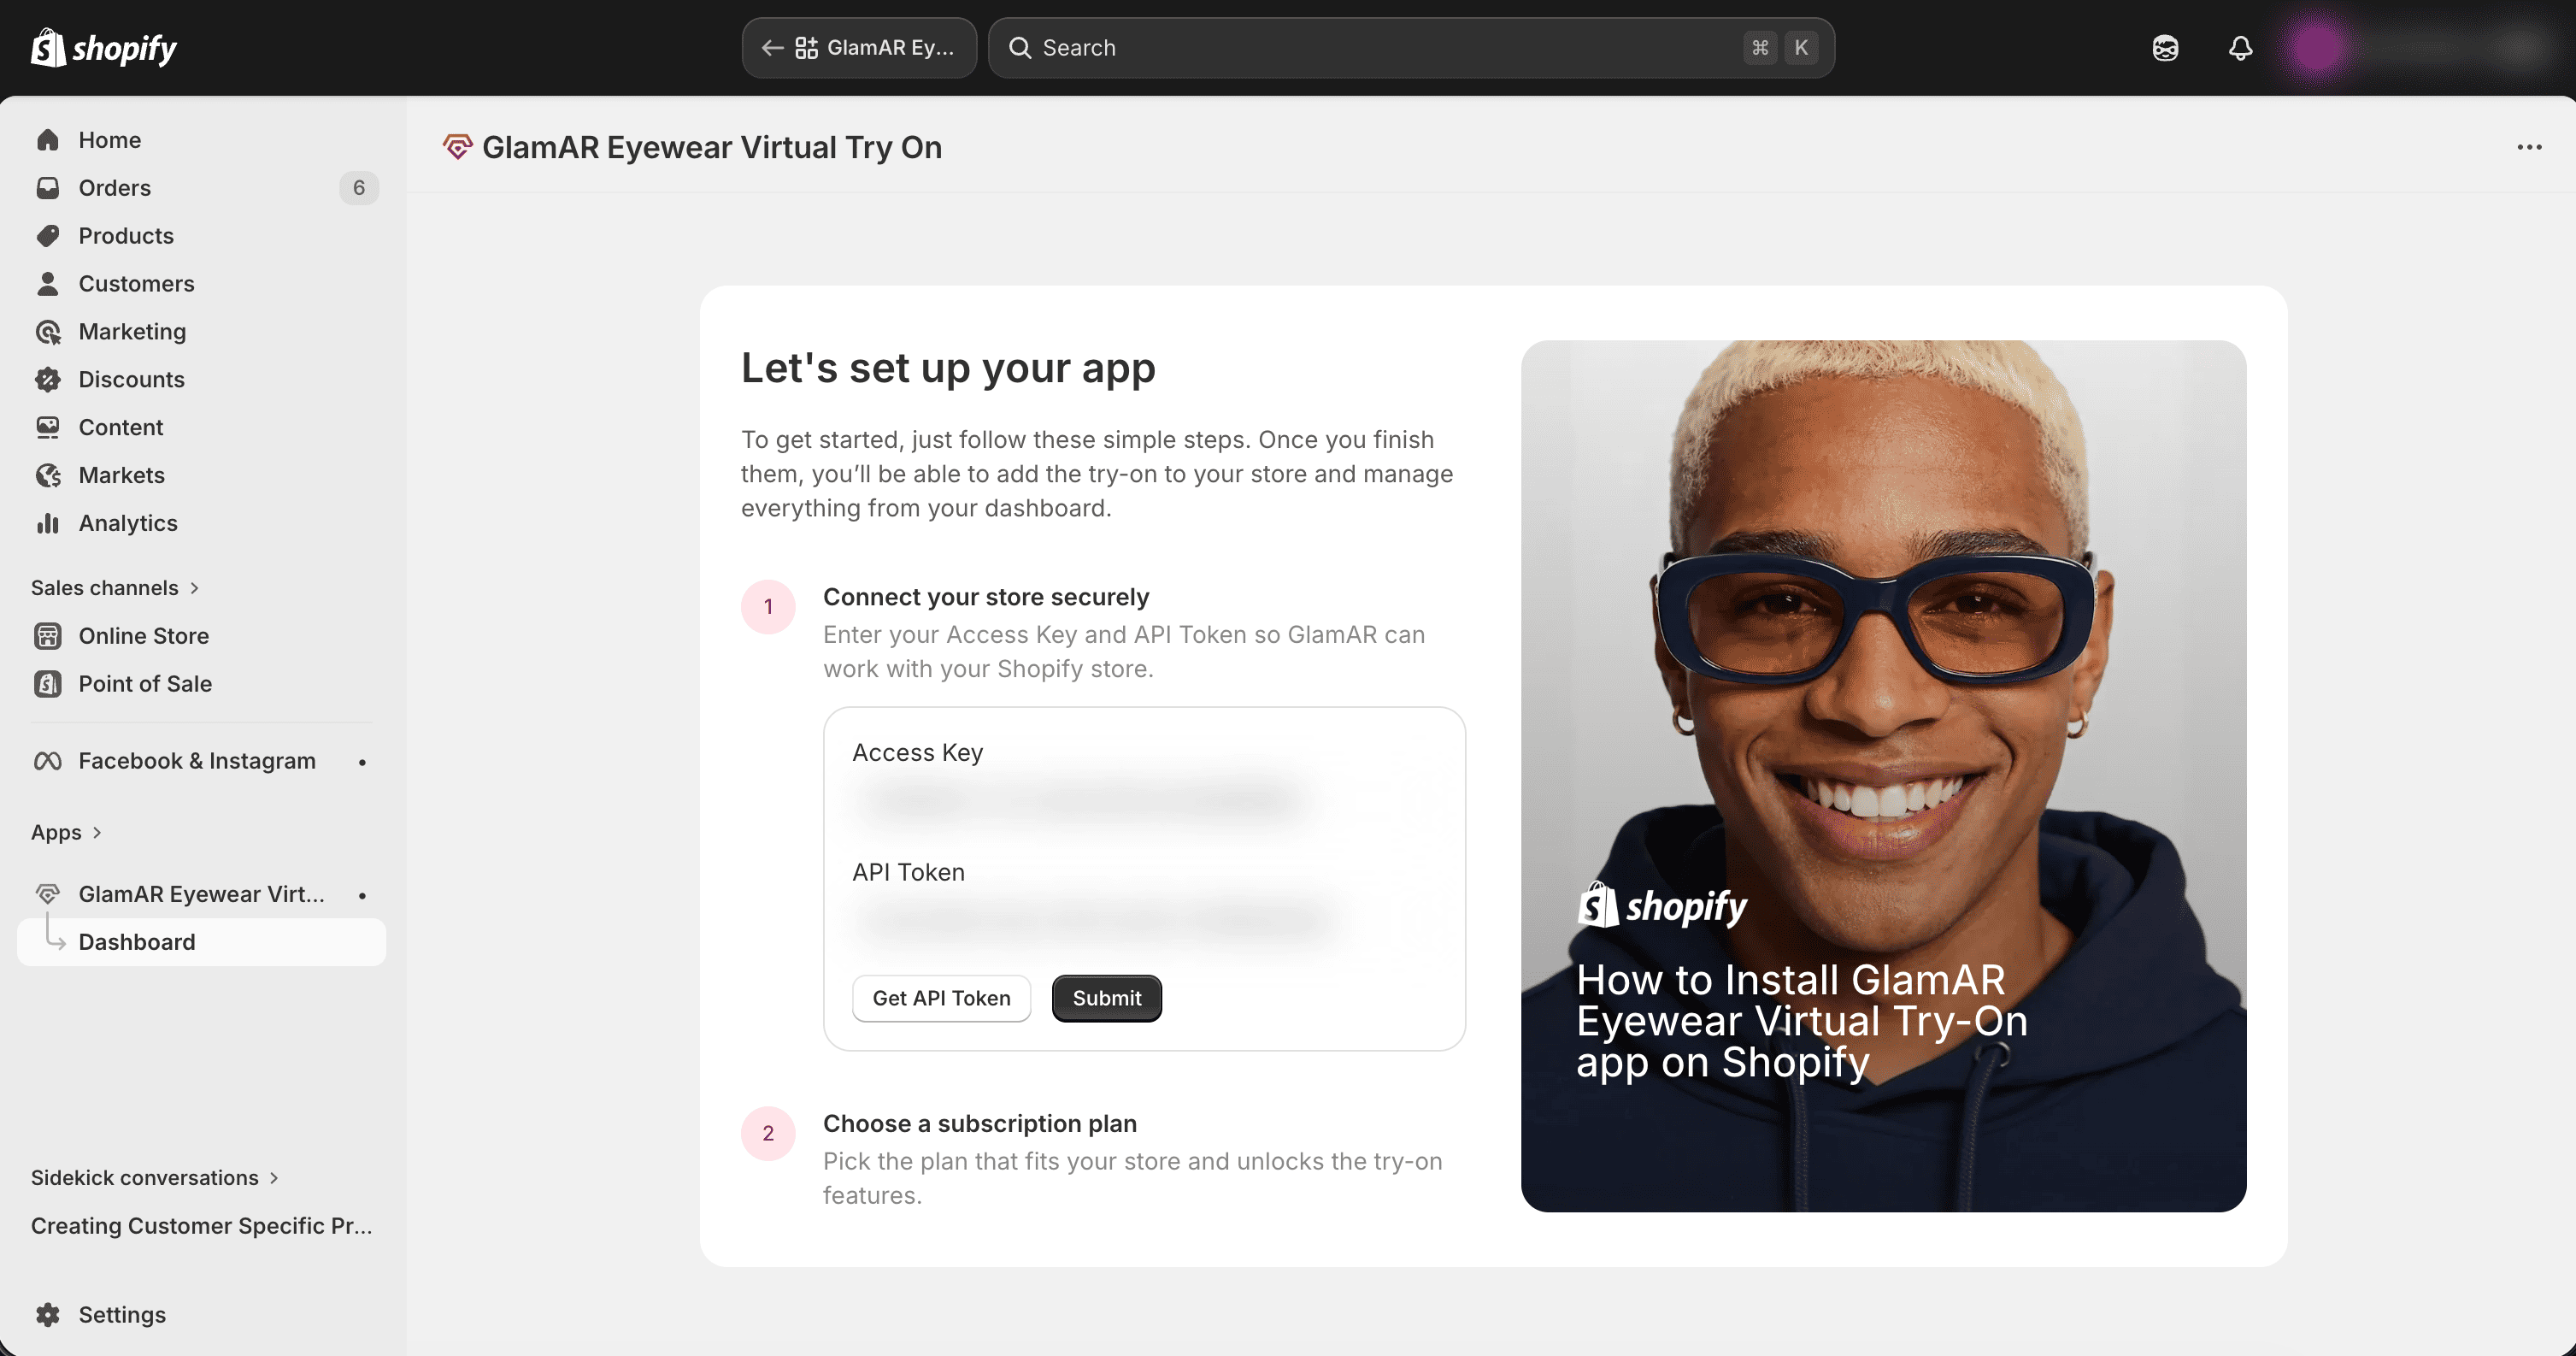
Once submitted successfully, your Shopify store is securely connected to GlamAR.
How It Works
- The Access Key is the access token used by the GlamAR SDK.
- The API Token is the API key used for GlamAR platform or public API calls. Keep it out of storefront theme code.
- Both credentials must remain valid for the plugin to function properly.
For custom API integrations, route client requests through your own backend proxy. See Token: credential differences and API proxy setup.
Enter credentials only in the plugin’s designated fields. Keep the API Token secret; never embed it in client-side code.
Select Your Plan
After successfully connecting your store, the next step is choosing a subscription plan. You will see available plan options. Review the plans and terms shown in Shopify and select the plan that fits your store.
What Happens Next
After selecting your desired plan:
- Click Approve.
- Confirm the subscription.
- Shopify will activate the selected plan.
Once approved, your GlamAR Eyewear Virtual Try-On plugin is fully activated.